WPF – 3D 图形
WPF – 3D 图形
Windows Presentation Foundation (WPF) 提供了根据您的应用程序要求绘制、转换和动画 3D 图形的功能。它不支持完整的 3D 游戏开发,但在某种程度上,您可以创建 3D 图形。
通过结合 2D 和 3D 图形,您还可以创建丰富的控件、提供复杂的数据插图或增强应用程序界面的用户体验。Viewport3D 元素将 3D 模型托管到我们的 WPF 应用程序中。
例子
让我们通过一个简单的例子来了解如何使用 3D 图形。
-
创建一个名为WPF3DGraphics的新 WPF 项目。
-
以下 XAML 代码显示了如何使用 3D 几何体创建 2D 对象。
<Window x:Class = "WPF3DGraphics.MainWindow"
   xmlns = "http://schemas.microsoft.com/winfx/2006/xaml/presentation"
   xmlns:x = "http://schemas.microsoft.com/winfx/2006/xaml"
   xmlns:mc = "http://schemas.openxmlformats.org/markup-compatibility/2006"
   xmlns:local = "clr-namespace:WPF3DGraphics"
   mc:Ignorable = "d" Title = "MainWindow" Height = "500" Width = "604">

   <Grid>
      <Viewport3D>

         <Viewport3D.Camera>
            <PerspectiveCamera Position = "2,0,10" LookDirection = "0.2,0.4,-1"
               FieldOfView = "65" UpDirection = "0,1,0" />
         </Viewport3D.Camera>

         <ModelVisual3D>
            <ModelVisual3D.Content>
               <Model3DGroup>
                  <AmbientLight Color = "Bisque" />

                  <GeometryModel3D>
                     <GeometryModel3D.Geometry>
                        <MeshGeometry3D Positions = "0,0,0 0,8,0 10,0,0 8,8,0"
                           Normals = "0,0,1 0,0,1 0,0,1 0,0,1" TriangleIndices = "0,2,1 1,2,3"/>
                     </GeometryModel3D.Geometry>

                     <GeometryModel3D.Material>
                        <DiffuseMaterial Brush = "Bisque" />
                     </GeometryModel3D.Material>
                  </GeometryModel3D>

               </Model3DGroup>
            </ModelVisual3D.Content>
         </ModelVisual3D>

      </Viewport3D>
   </Grid>

</Window>
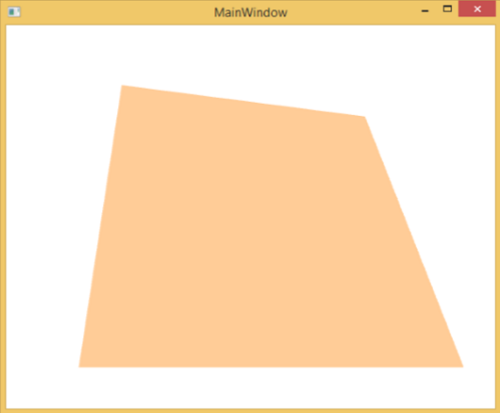
当你编译并执行上面的代码时,它会产生一个 3D 的 2D 对象。

例子
让我们看另一个显示 3D 对象的示例。
-
创建一个名为WPF3DGraphics1的新 WPF 项目
-
以下 XAML 代码创建一个 3D 对象和一个滑块。在滑块的帮助下,您可以旋转这个 3D 对象。
<Window x:Class = "WPF3DGraphics1.MainWindow"
   xmlns = "http://schemas.microsoft.com/winfx/2006/xaml/presentation"
   xmlns:x = "http://schemas.microsoft.com/winfx/2006/xaml"
   xmlns:d = "http://schemas.microsoft.com/expression/blend/2008"
   xmlns:mc = "http://schemas.openxmlformats.org/markup-compatibility/2006"
   xmlns:local = "clr-namespace:WPF3DGraphics1"
   mc:Ignorable = "d" Title = "MainWindow" Height = "350" Width = "525">

   <Grid>
      <Viewport3D Name="viewport3D1">

         <Viewport3D.Camera>
            <PerspectiveCamera x:Name = "camMain" Position = "6 5 4" LookDirection = "-6 -5 -4">
            </PerspectiveCamera>
         </Viewport3D.Camera>

         <ModelVisual3D>
            <ModelVisual3D.Content>
               <DirectionalLight x:Name = "dirLightMain" Direction = "-1,-1,-1">
               </DirectionalLight>
            </ModelVisual3D.Content>
         </ModelVisual3D>

         <ModelVisual3D x:Name = "MyModel">
            <ModelVisual3D.Content>
               <GeometryModel3D>

                  <GeometryModel3D.Geometry>
                     <MeshGeometry3D x:Name = "meshMain"
                        Positions = "0 0 0  1 0 0  0 1 0  1 1 0  0 0 1  1 0 1  0 1 1  0 1 1"
                        TriangleIndices = "2 3 1  3 1 0  7 1 3  7 5 1  6 5 7  6 4 5  6 2 0
                        2 0 4  2 7 3  2 6 7  0 1 5  0 5 4">
                     </MeshGeometry3D>
                  </GeometryModel3D.Geometry>

                  <GeometryModel3D.Material>
                     <DiffuseMaterial x:Name = "matDiffuseMain">
                        <DiffuseMaterial.Brush>
                           <SolidColorBrush Color = "Bisque"/>
                        </DiffuseMaterial.Brush>
                     </DiffuseMaterial>
                  </GeometryModel3D.Material>

               </GeometryModel3D>
            </ModelVisual3D.Content>

            <ModelVisual3D.Transform>
               <RotateTransform3D>
                  <RotateTransform3D.Rotation>
                     <AxisAngleRotation3D x:Name = "rotate" Axis = "1 2 1"/>
                  </RotateTransform3D.Rotation>
               </RotateTransform3D>
            </ModelVisual3D.Transform>

         </ModelVisual3D>
      </Viewport3D>

      <Slider Height = "23" HorizontalAlignment = "Left"
         Margin = "145,271,0,0" Name = "slider1"
         VerticalAlignment = "Top" Width = "269"
         Maximum = "360"
         Value = "{Binding ElementName = rotate, Path=Angle}" />

   </Grid>

</Window>
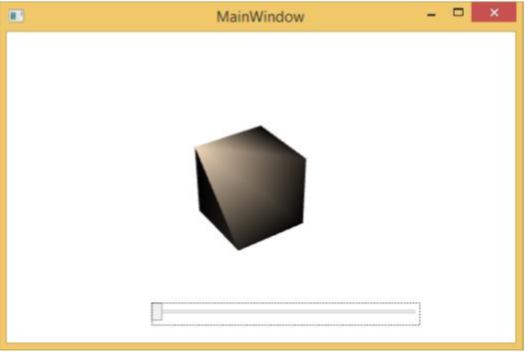
当您运行您的应用程序时,它将在您的窗口上生成一个 3D 对象和一个滑块。

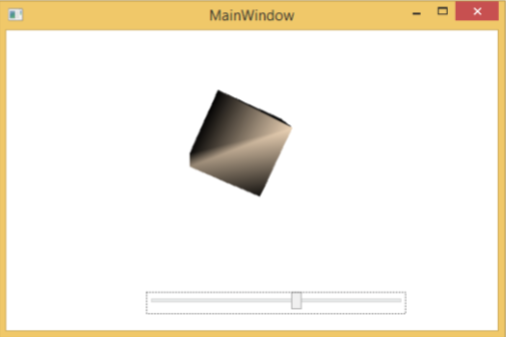
当您滑动滑块时,窗口上的对象也会旋转。

我们建议您执行上述代码并尝试更多 3D 几何体。
