笔记列表:
ArangoDB-Web界面
在本章中,我们将学习如何启用/禁用身份验证,以及如何将ArangoDB绑定到公共网络接口。
# arangosh --server.endpoint tcp://127.0.0.1:8529 --server.database "_system"
它将提示您输入先前保存的密码−
Please specify a password:
使用为root用户创建的密码,在配置中。
您还可以使用curl来检查您是否确实获得了针对需要身份验证的请求的http401(未经授权)服务器响应−
# curl --dump - http://127.0.0.1:8529/_api/version
输出
HTTP/1.1 401 Unauthorized
X-Content-Type-Options: nosniff
Www-Authenticate: Bearer token_type = "JWT", realm = "ArangoDB"
Server: ArangoDB
Connection: Keep-Alive
Content-Type: text/plain; charset = utf-8
Content-Length: 0
为了避免每次在学习过程中输入密码,我们将禁用身份验证。为此,请打开配置文件−
# vim /etc/arangodb3/arangod.conf
如果代码不正确可见,则应更改颜色方案。
:colorscheme desert
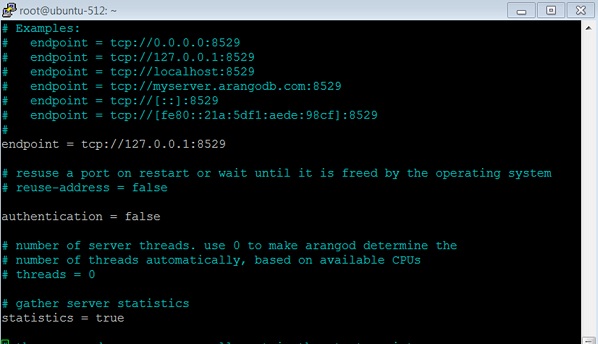
将authentication设置为false,如下面的屏幕截图所示。

重新启动服务−
# service arangodb3 restart
On making the authentication false, you will be able to login (either with root or created user like 哈利 in this case) without entering any password in 请指定密码.
Let us check the 应用程序编程接口 version when the authentication is switched off −
# curl --dump - http://127.0.0.1:8529/_api/version
输出
HTTP/1.1 200 OK
X-Content-Type-Options: nosniff
Server: ArangoDB
Connection: Keep-Alive
Content-Type: application/json; charset=utf-8
Content-Length: 60
{"server":"arango","version":"3.1.27","license":"community"}
