作者选择联合国基金会接受捐赠,作为Write for DOnations计划的一部分。
本教程的原始WordPress 版本由Kathleen Juell 编写。
介绍
Drupal是一个用PHP 编写并在开源GNU 通用公共许可证下分发的内容管理系统 (CMS) 。世界各地的人们和组织都使用 Drupal 来为政府网站、个人博客、企业等提供支持。Drupal 与其他 CMS 框架的独特之处在于其不断发展的社区和一组功能,包括安全流程、可靠的性能、模块化和适应灵活性。
Drupal 需要安装LAMP(Linux、Apache、MySQL 和 PHP)或LEMP(Linux、Nginx、MySQL 和 PHP)堆栈,但安装单个组件是一项耗时的任务。我们可以使用Docker和Docker Compose等工具来简化安装 Drupal 的过程。本教程将使用 Docker 镜像在 Docker 容器中安装各个组件。通过使用 Docker Compose,我们可以为数据库、应用程序以及它们之间的网络/通信定义和管理多个容器。
在本教程中,我们将使用 Docker Compose 安装 Drupal,以便我们可以利用容器化并在服务器上部署我们的 Drupal 网站。我们将为MySQL数据库、Nginx网络服务器和 Drupal运行容器。我们还将通过使用 Let’s Encrypt为要与我们的站点关联的域获取TLS/SSL 证书来保护我们的安装。最后,我们将设置一个cron 作业来更新我们的证书,以便我们的域保持安全。
先决条件
要学习本教程,我们需要:
- 运行 Ubuntu 18.04 的服务器,以及具有
sudo特权和活动防火墙的非 root 用户。有关如何设置这些的指导,请参阅此初始服务器设置指南。 - 按照如何在 Ubuntu 18.04 上安装和使用 Docker 的步骤 1 和 2 在您的服务器上安装 Docker。本教程已在 19.03.8 版本上测试。
- 按照如何在 Ubuntu 18.04 上安装 Docker Compose 的步骤 1 在您的服务器上安装 Docker Compose。本教程已在 1.21.2 版本上测试。
- 一个注册的域名。本教程将
your_domain贯穿始终。您可以在Freenom免费获得一个,或者使用您选择的域名注册商。 - 为您的服务器设置的以下两个 DNS 记录。您可以按照对 DigitalOcean DNS的介绍了解有关如何将它们添加到 DigitalOcean 帐户的详细信息,如果这是您使用的:
your_domain指向您服务器的公共 IP 地址的 A 记录。- 指向您服务器的公共 IP 地址的 A 记录。
www.your_domain
步骤 1 — 定义 Web 服务器配置
在运行任何容器之前,我们需要为我们的 Nginx Web 服务器定义配置。我们的配置文件将包含一些特定于 Drupal 的位置块,以及一个位置块,用于将 Let’s Encrypt 验证请求定向到 Certbot 客户端以进行自动证书续订。
首先,让我们为我们的 Drupal 设置创建一个名为 的项目目录drupal:
- mkdir drupal
移动到新创建的目录:
- cd drupal
现在我们可以为我们的配置文件创建一个目录:
- mkdir nginx-conf
使用 nano 或您喜欢的文本编辑器打开文件:
- nano nginx-conf/nginx.conf
在此文件中,我们将添加一个带有服务器名称和文档根指令的服务器块,以及用于引导 Certbot 客户端对证书、PHP 处理和静态资产请求的请求的位置块。
将以下代码添加到文件中。一定要替换成your_domain自己的域名:
server {
    listen 80;
    listen [::]:80;

    server_name your_domain www.your_domain;

    index index.php index.html index.htm;

    root /var/www/html;

    location ~ /.well-known/acme-challenge {
        allow all;
        root /var/www/html;
    }

    location / {
        try_files $uri $uri/ /index.php$is_args$args;
    }

    rewrite ^/core/authorize.php/core/authorize.php(.*)$ /core/authorize.php$1;

    location ~ \.php$ {
        try_files $uri =404;
        fastcgi_split_path_info ^(.+\.php)(/.+)$;
        fastcgi_pass drupal:9000;
        fastcgi_index index.php;
        include fastcgi_params;
        fastcgi_param SCRIPT_FILENAME $document_root$fastcgi_script_name;
        fastcgi_param PATH_INFO $fastcgi_path_info;
    }

    location ~ /\.ht {
        deny all;
    }

    location = /favicon.ico {
        log_not_found off; access_log off;
    }
    location = /robots.txt {
        log_not_found off; access_log off; allow all;
    }
    location ~* \.(css|gif|ico|jpeg|jpg|js|png)$ {
        expires max;
        log_not_found off;
    }
}
我们的服务器块包括以下信息:
指令:
-
listen:这告诉 Nginx 监听端口80,这将允许我们使用 Certbot 的webroot 插件来处理我们的证书请求。请注意,我们还没有包括端口443——一旦我们成功获得我们的证书,我们将更新我们的配置以包括 SSL。 -
server_name:这定义了我们的服务器名称和应该用于向我们的服务器发出请求的服务器块。请务必your_domain将这一行替换为您自己的域名。 -
index: index 指令定义了在处理对我们服务器的请求时将用作索引的文件。我们在这里修改了默认的优先级顺序,移动index.php到前面,index.html以便 Nginxindex.php在可能的情况下优先考虑调用的文件。 -
root:我们的 root 指令为对我们服务器的请求命名根目录。这个目录/var/www/html是在构建时根据我们的 Drupal Dockerfile 中的指令创建的挂载点。这些 Dockerfile 指令还确保将 Drupal 版本中的文件挂载到此卷。 -
rewrite:如果指定的正则表达式 (^/core/authorize.php/core/authorize.php(.*)$) 与请求 URI 匹配,则 URI 将按照替换字符串 (/core/authorize.php$1)中的指定进行更改。
位置块:
-
location ~ /.well-known/acme-challenge:此位置块将处理对.well-known目录的请求,Certbot 将在其中放置一个临时文件以验证我们域的 DNS 是否解析到我们的服务器。有了这个配置,我们将能够使用 Certbot 的 webroot 插件来获取我们域的证书。 -
location /:在这个位置块中,我们将使用一个try_files指令来检查与单个 URI 请求匹配的文件。404 Not Found然而,我们将index.php使用请求参数将控制权传递给 Drupal 的文件,而不是将状态作为默认值返回。 -
location ~ \.php$:这个位置块将处理 PHP 处理并将这些请求代理到我们的drupal容器。因为我们的 Drupal Docker 镜像将基于该php:fpm镜像,我们还将在此块中包含特定于FastCGI 协议的配置选项。Nginx 需要一个独立的 PHP 处理器来处理 PHP 请求:在我们的例子中,这些请求将由php-fpm包含在php:fpm图像中的处理器处理。此外,这个位置块包括 FastCGI 特定的指令、变量和选项,它们将请求代理到在我们的 Drupal 容器中运行的 Drupal 应用程序,为解析的请求 URI 设置首选索引,并解析 URI 请求。 -
location ~ /\.ht:此块将处理.htaccess文件,因为 Nginx 不会为它们提供服务。该deny_all指令确保.htaccess永远不会向用户提供文件。 -
location = /favicon.ico, location = /robots.txt:这些模块确保请求/favicon.ico并/robots.txt不会被记录。 -
location ~* \.(css|gif|ico|jpeg|jpg|js|png)$:此块关闭静态资产请求的日志记录,并确保这些资产具有高度可缓存性,因为它们的服务成本通常很高。
有关 FastCGI 代理的更多信息,请参阅在 Nginx 中了解和实现 FastCGI 代理。有关服务器和位置块的信息,请参阅了解 Nginx 服务器和位置块选择算法。
完成编辑后保存并关闭文件。
设置好 Nginx 配置后,您可以继续创建环境变量以在运行时传递给您的应用程序和数据库容器。
步骤 2 — 定义环境变量
我们的 Drupal 应用程序需要一个数据库(MySQL、PostgresSQL 等)来保存与站点相关的信息。Drupal 容器需要在运行时访问某些环境变量才能访问数据库 (MySQL) 容器。这些变量包含敏感信息,例如数据库的凭据,因此我们无法直接在 Docker Compose 文件中公开它们——该文件包含有关容器如何运行的信息。
始终建议在.env文件中设置敏感值并限制其流通。这将防止这些值复制到我们的项目存储库并公开公开。
在主项目目录中~/drupal,创建并打开一个名为.env:
- nano .env
将以下变量添加到.env文件中,用您要使用的凭据替换突出显示的部分:
MYSQL_ROOT_PASSWORD=root_password
MYSQL_DATABASE=drupal
MYSQL_USER=drupal_database_user
MYSQL_PASSWORD=drupal_database_password
我们现在已经添加了 MySQL 根管理帐户的密码,以及我们的应用程序数据库的首选用户名和密码。
我们的.env文件包含敏感信息,因此始终建议将其包含在项目.gitignore和.dockerignore文件中,以免将其添加到我们的 Git 存储库和 Docker 映像中。
如果您打算使用Git工作进行版本控制,初始化当前工作目录作为仓库使用git init:
- git init
打开.gitignore文件:
- nano .gitignore
添加以下内容:
.env
保存并退出文件。
同样,打开.dockerignore文件:
- nano .dockerignore
然后添加以下内容:
.env
.git
保存并退出文件。
现在我们已经采取措施保护我们的凭据作为环境变量,让我们进入下一步在docker-compose.yml文件中定义我们的服务。
第 3 步 – 使用 Docker Compose 定义服务
Docker Compose 是一个用于定义和运行多容器 Docker 应用程序的工具。我们定义了一个YAML文件来配置我们应用程序的服务。一个服务在码头工人的撰写是一个正在运行的容器,并撰写可以让我们这些服务一起共享卷和网络链接。
我们将为我们的 Drupal 应用程序、数据库和 Web 服务器创建不同的容器。除了这些,我们还将创建一个容器来运行Certbot,以便为我们的 Web 服务器获取证书。
创建一个docker-compose.yml文件:
- nano docker-compose.yml
添加以下代码以定义 Compose 文件版本和mysql数据库服务:
version: "3"

services:
  mysql:
    image: mysql:8.0
    container_name: mysql
    command: --default-authentication-plugin=mysql_native_password
    restart: unless-stopped
    env_file: .env
    volumes:
      - db-data:/var/lib/mysql
    networks:
      - internal
让我们一一浏览这些mysql服务的所有配置选项:
-
image:这指定将用于/拉用于创建容器的图像。始终建议使用带有正确版本标签的图像,不包括latest标签以避免将来发生冲突。从 Docker 文档中阅读有关Dockerfile 最佳实践的更多信息。 -
container_name: 定义容器的名称。 -
command: 这用于覆盖图像中的默认命令(CMD 指令)。MySQL 支持不同的身份验证插件,但mysql_native_password它是传统的身份验证方法。由于 PHP 和 Drupal 不支持较新的 MySQL 身份验证,我们需要将 设置--default-authentication-plugin=mysql_native_password为默认身份验证机制。 -
restart:用于定义容器重启策略。unless-stopped除非手动停止,否则该策略会重新启动容器。 -
env_file:这会从文件中添加环境变量。在我们的例子中,它将从.env上一步定义的文件中读取环境变量。 -
volumes:这会挂载主机路径或命名卷,指定为服务的子选项。我们正在安装一个命名卷,称为容器上db-data的/var/lib/mysql目录,默认情况下 MySQL 将写入其数据文件。 -
networks:这定义了internal我们的应用程序服务将加入的网络。我们将在文件末尾定义网络。
我们已经定义了我们的mysql服务定义,现在让我们将drupal应用程序服务的定义添加到文件的末尾:
...
  drupal:
    image: drupal:8.7.8-fpm-alpine
    container_name: drupal
    depends_on:
      - mysql
    restart: unless-stopped
    networks:
      - internal
      - external
    volumes:
      - drupal-data:/var/www/html
在这个服务定义中,我们命名我们的容器并定义一个重启策略,就像我们对mysql服务所做的那样。我们还添加了一些特定于此容器的选项:
-
image:这里,我们使用的是8.7.8-fpm-alpineDrupal 镜像。此图像具有php-fpm我们的 Nginx Web 服务器处理 PHP 处理所需的处理器。此外,我们正在使用alpine源自Alpine Linux 项目的镜像,这将减少整体镜像的大小,并在Dockerfile 最佳实践中推荐。Drupal 有更多版本的镜像,所以在Dockerhub上查看它们。 -
depends_on: 这用于表达服务之间的依赖关系。将mysql服务定义为对我们drupal容器的依赖,将确保我们的drupal容器会在mysql容器之后创建,并使我们的应用程序能够顺利启动。 -
networks:在这里,我们已将此容器与external网络一起添加到internal网络中。这将确保我们的mysql服务只能drupal通过internal网络从容器访问,同时让其他容器通过external网络访问该容器。 -
volumes:我们正在挂载一个命名卷drupal-data,该卷调用/var/www/html由Drupal 映像创建的挂载点。以这种方式使用命名卷将允许我们与其他容器共享我们的应用程序代码。
接下来,让我们在服务定义之后添加 Nginxdrupal服务定义:
...
  webserver:
    image: nginx:1.17.4-alpine
    container_name: webserver
    depends_on:
      - drupal
    restart: unless-stopped
    ports:
      - 80:80
    volumes:
      - drupal-data:/var/www/html
      - ./nginx-conf:/etc/nginx/conf.d
      - certbot-etc:/etc/letsencrypt
    networks:
      - external
同样,我们命名我们的容器并使其按照启动顺序依赖于 Drupal 容器。我们还使用了一个高山图像1.17.4-alpine——Nginx 图像。
此服务定义还包括以下选项:
-
ports:这会暴露端口80以启用我们nginx.conf在第 1 步中的文件中定义的配置选项。 -
volumes:在这里,我们定义了命名卷和主机路径:drupal-data:/var/www/html:这会将我们的 Drupal 应用程序代码挂载到/var/www/html我们在 Nginx 服务器块中设置为根目录的目录中。./nginx-conf:/etc/nginx/conf.d:这会将主机上的 Nginx 配置目录挂载到容器上的相关目录,确保我们对主机上的文件所做的任何更改都会反映在容器中。certbot-etc:/etc/letsencrypt:这会将我们域的相关 Let’s Encrypt 证书和密钥安装到容器上的相应目录中。networks:我们定义external网络只是为了让这个容器与容器通信,drupal而不是与容器通信mysql。
最后,我们将为服务添加最后一个服务定义certbot。请务必将sammy@your_domain和替换your_domain为您自己的电子邮件和域名:
...
  certbot:
    depends_on:
      - webserver
    image: certbot/certbot
    container_name: certbot
    volumes:
      - certbot-etc:/etc/letsencrypt
      - drupal-data:/var/www/html
    command: certonly --webroot --webroot-path=/var/www/html --email sammy@your_domain --agree-tos --no-eff-email --staging -d your_domain -d www.your_domain
这个定义告诉 Composecertbot/certbot从 Docker Hub拉取镜像。它还使用命名卷与 Nginx 容器共享资源,包括域证书和密钥certbot-etc以及drupal-data.
我们还用于depends_on确保certbot在webserver服务运行后启动容器。
我们没有networks在此处指定任何内容,因为此容器不会通过网络与任何服务进行通信。它仅添加我们使用命名卷挂载的域证书和密钥。
我们还包含了command指定子命令以使用容器的默认certbot命令运行的选项。Certbot 客户端支持用于获取和安装证书的插件。我们正在使用该webroot插件通过在命令行中包含certonly和来获取证书--webroot。从官方Certbot 文档中阅读有关插件和其他命令的更多信息。
在certbot服务定义之后,添加网络和卷定义:
...
networks:
  external:
    driver: bridge
  internal:
    driver: bridge

volumes:
  drupal-data:
  db-data:
  certbot-etc:
顶级networks键让我们指定要创建的网络。networks允许跨所有端口上的服务/容器进行通信,因为它们位于同一个 Docker 守护进程主机上。我们已经定义了两个网络,internal并且external,以确保的通信webserver,drupal和mysql服务。
该volumes键是用来定义命名的体积drupal-data,db-data和certbot-etc。当 Docker 创建卷时,卷的内容存储在主机文件系统上的目录中,该目录/var/lib/docker/volumes/由 Docker 管理。然后每个卷的内容从此目录安装到使用该卷的任何容器。通过这种方式,可以在容器之间共享代码和数据。
完成的docker-compose.yml文件将如下所示:
version: "3"

services:
  mysql:
    image: mysql:8.0
    container_name: mysql
    command: --default-authentication-plugin=mysql_native_password
    restart: unless-stopped
    env_file: .env
    volumes:
      - db-data:/var/lib/mysql
    networks:
      - internal

  drupal:
    image: drupal:8.7.8-fpm-alpine
    container_name: drupal
    depends_on:
      - mysql
    restart: unless-stopped
    networks:
      - internal
      - external
    volumes:
      - drupal-data:/var/www/html

  webserver:
    image: nginx:1.17.4-alpine
    container_name: webserver
    depends_on:
      - drupal
    restart: unless-stopped
    ports:
      - 80:80
    volumes:
      - drupal-data:/var/www/html
      - ./nginx-conf:/etc/nginx/conf.d
      - certbot-etc:/etc/letsencrypt
    networks:
      - external

  certbot:
    depends_on:
      - webserver
    image: certbot/certbot
    container_name: certbot
    volumes:
      - certbot-etc:/etc/letsencrypt
      - drupal-data:/var/www/html
    command: certonly --webroot --webroot-path=/var/www/html --email sammy@your_domain --agree-tos --no-eff-email --staging -d your_domain -d www.your_domain

networks:
  external:
    driver: bridge
  internal:
    driver: bridge

volumes:
  drupal-data:
  db-data:
  certbot-etc:
我们已经完成了定义我们的服务。接下来,让我们启动容器并测试我们的证书请求。
第 4 步 – 获取 SSL 证书和凭据
我们可以使用docker-compose up命令启动我们的容器,该命令将按照我们指定的顺序创建和运行我们的容器。如果我们的域请求成功,我们将在输出中看到正确的退出状态以及安装在/etc/letsencrypt/liveWeb 服务器容器文件夹中的正确证书。
要在后台运行容器,请使用docker-compose up带有-d标志的命令:
- docker-compose up -d
您将看到类似的输出,确认您的服务已创建:
Output...
Creating mysql     ... done
Creating drupal    ... done
Creating webserver ... done
Creating certbot   ... done
使用以下docker-compose ps命令检查服务的状态:
- docker-compose ps
我们将看到mysql,drupal和webserver有服务State的Up,而certbot将与退出0状态消息:
Output  Name                 Command               State           Ports
--------------------------------------------------------------------------
certbot     certbot certonly --webroot ...   Exit 0
drupal      docker-php-entrypoint php-fpm    Up       9000/tcp
mysql       docker-entrypoint.sh --def ...   Up       3306/tcp, 33060/tcp
webserver   nginx -g daemon off;             Up       0.0.0.0:80->80/tcp
如果你看到以外的任何其他Up在State列的mysql,drupal或webserver服务,或以外的退出状态0的certbot容器,一定要检查与服务日志docker-compose logs命令:
- docker-compose logs service_name
我们现在可以webserver使用以下docker-compose exec命令检查我们的证书是否安装在容器上:
- docker-compose exec webserver ls -la /etc/letsencrypt/live
这将提供以下输出:
Outputtotal 16
drwx------    3 root     root          4096 Oct  5 09:15 .
drwxr-xr-x    9 root     root          4096 Oct  5 09:15 ..
-rw-r--r--    1 root     root           740 Oct  5 09:15 README
drwxr-xr-x    2 root     root          4096 Oct  5 09:15 your_domain
现在一切都成功运行了,我们可以编辑我们的certbot服务定义以删除该--staging标志。
打开docker-compose.yml文件,转到certbot服务定义,并将--staging命令选项中的--force-renewal标志替换为标志,这将告诉 Certbot 您要请求与现有证书具有相同域的新证书。更新后的certbot定义如下所示:
...
  certbot:
    depends_on:
      - webserver
    image: certbot/certbot
    container_name: certbot
    volumes:
      - certbot-etc:/etc/letsencrypt
      - drupal-data:/var/www/html
    command: certonly --webroot --webroot-path=/var/www/html --email sammy@your_domain --agree-tos --no-eff-email --force-renewal -d your_domain -d www.your_domain
...
我们需要docker-compose up再次运行以重新创建certbot容器。我们还将包括--no-deps告诉 Compose 它可以跳过启动webserver服务的选项,因为它已经在运行:
- docker-compose up --force-recreate --no-deps certbot
我们将看到表明我们的证书请求成功的输出:
OutputRecreating certbot ... done
Attaching to certbot
certbot      | Saving debug log to /var/log/letsencrypt/letsencrypt.log
certbot      | Plugins selected: Authenticator webroot, Installer None
certbot      | Renewing an existing certificate
certbot      | Performing the following challenges:
certbot      | http-01 challenge for your_domain
certbot      | http-01 challenge for www.your_domain
certbot      | Using the webroot path /var/www/html for all unmatched domains.
certbot      | Waiting for verification...
certbot      | Cleaning up challenges
certbot      | IMPORTANT NOTES:
certbot      |  - Congratulations! Your certificate and chain have been saved at:
certbot      |    /etc/letsencrypt/live/your_domain/fullchain.pem
certbot      |    Your key file has been saved at:
certbot      |    /etc/letsencrypt/live/your_domain/privkey.pem
certbot      |    Your cert will expire on 2020-01-03. To obtain a new or tweaked
certbot      |    version of this certificate in the future, simply run certbot
certbot      |    again. To non-interactively renew *all* of your certificates, run
certbot      |    "certbot renew"
certbot      |  - Your account credentials have been saved in your Certbot
certbot      |    configuration directory at /etc/letsencrypt. You should make a
certbot      |    secure backup of this folder now. This configuration directory will
certbot      |    also contain certificates and private keys obtained by Certbot so
certbot      |    making regular backups of this folder is ideal.
certbot      |  - If you like Certbot, please consider supporting our work by:
certbot      |
certbot      |    Donating to ISRG / Let's Encrypt:   https://letsencrypt.org/donate
certbot      |    Donating to EFF:                    https://eff.org/donate-le
certbot      |
certbot exited with code 0
现在我们已经成功生成了我们的证书,我们可以更新我们的 Nginx 配置以包含 SSL。
步骤 5 — 修改 Web 服务器配置和服务定义
在 Nginx 中安装 SSL 证书后,我们需要将所有 HTTP 请求重定向到 HTTPS。我们还必须指定我们的 SSL 证书和密钥位置,并添加安全参数和标头。
由于您要重新创建webserver服务以包含这些添加项,您现在可以停止它:
- docker-compose stop webserver
这将提供以下输出:
OutputStopping webserver ... done
接下来,让我们删除我们之前创建的 Nginx 配置文件:
- rm nginx-conf/nginx.conf
打开另一个版本的文件:
- nano nginx-conf/nginx.conf
将以下代码添加到文件以将 HTTP 重定向到 HTTPS 并添加 SSL 凭据、协议和安全标头。请记住your_domain用您自己的域替换:
server {
    listen 80;
    listen [::]:80;

    server_name your_domain www.your_domain;

    location ~ /.well-known/acme-challenge {
        allow all;
        root /var/www/html;
    }

    location / {
        rewrite ^ https://$host$request_uri? permanent;
    }
}
server {
    listen 443 ssl;
    listen [::]:443 ssl;
    server_name your_domain www.your_domain;

    index index.php index.html index.htm;

    root /var/www/html;

    server_tokens off;

    ssl_certificate /etc/letsencrypt/live/your_domain/fullchain.pem;
    ssl_certificate_key /etc/letsencrypt/live/your_domain/privkey.pem;

    add_header X-Frame-Options "SAMEORIGIN" always;
    add_header X-XSS-Protection "1; mode=block" always;
    add_header X-Content-Type-Options "nosniff" always;
    add_header Referrer-Policy "no-referrer-when-downgrade" always;
    add_header Content-Security-Policy "default-src * data: 'unsafe-eval' 'unsafe-inline'" always;

    location / {
        try_files $uri $uri/ /index.php$is_args$args;
    }

    rewrite ^/core/authorize.php/core/authorize.php(.*)$ /core/authorize.php$1;

    location ~ \.php$ {
        try_files $uri =404;
        fastcgi_split_path_info ^(.+\.php)(/.+)$;
        fastcgi_pass drupal:9000;
        fastcgi_index index.php;
        include fastcgi_params;
        fastcgi_param SCRIPT_FILENAME $document_root$fastcgi_script_name;
        fastcgi_param PATH_INFO $fastcgi_path_info;
    }

    location ~ /\.ht {
        deny all;
    }

    location = /favicon.ico {
        log_not_found off; access_log off;
    }
    location = /robots.txt {
        log_not_found off; access_log off; allow all;
    }
    location ~* \.(css|gif|ico|jpeg|jpg|js|png)$ {
        expires max;
        log_not_found off;
    }
}
HTTP 服务器块指定用于对.well-known/acme-challenge目录的Certbot 续订请求的 webroot 插件。它还包括rewrite将 HTTP 请求定向到根目录到 HTTPS的指令。
HTTPS 服务器块启用ssl和http2. 要了解有关 HTTP/2 如何迭代 HTTP 协议及其对网站性能的好处的更多信息,请参阅如何在 Ubuntu 18.04 上设置支持 HTTP/2 的 Nginx的介绍。
这些块启用 SSL,因为我们已经包含了我们的 SSL 证书和密钥位置以及推荐的标头。这些标头将使我们能够在SSL 实验室和安全标头服务器测试站点上获得A评级。
我们的root和index指令也位于此块中,与步骤 1 中讨论的 Drupal 特定位置块的其余部分一样。
保存并关闭更新后的 Nginx 配置文件。
在重新创建webserver容器之前,我们需要将443端口映射添加到我们的webserver服务定义中,因为我们已经启用了 SSL 证书。
打开docker-compose.yml文件:
- nano docker-compose.yml
在webserver服务定义中进行以下更改:
...
  webserver:
    image: nginx:1.17.4-alpine
    container_name: webserver
    depends_on:
      - drupal
    restart: unless-stopped
    ports:
      - 80:80
      - 443:443
    volumes:
      - drupal-data:/var/www/html
      - ./nginx-conf:/etc/nginx/conf.d
      - certbot-etc:/etc/letsencrypt
    networks:
      - external
...
启用 SSL 证书后,我们docker-compose.yml将如下所示:
version: "3"

services:
  mysql:
    image: mysql:8.0
    container_name: mysql
    command: --default-authentication-plugin=mysql_native_password
    restart: unless-stopped
    env_file: .env
    volumes:
      - db-data:/var/lib/mysql
    networks:
      - internal

  drupal:
    image: drupal:8.7.8-fpm-alpine
    container_name: drupal
    depends_on:
      - mysql
    restart: unless-stopped
    networks:
      - internal
      - external
    volumes:
      - drupal-data:/var/www/html

  webserver:
    image: nginx:1.17.4-alpine
    container_name: webserver
    depends_on:
      - drupal
    restart: unless-stopped
    ports:
      - 80:80
      - 443:443
    volumes:
      - drupal-data:/var/www/html
      - ./nginx-conf:/etc/nginx/conf.d
      - certbot-etc:/etc/letsencrypt
    networks:
      - external

  certbot:
    depends_on:
      - webserver
    image: certbot/certbot
    container_name: certbot
    volumes:
      - certbot-etc:/etc/letsencrypt
      - drupal-data:/var/www/html
    command: certonly --webroot --webroot-path=/var/www/html --email sammy@your_domain --agree-tos --no-eff-email --force-renewal -d your_domain -d www.your_domain

networks:
  external:
    driver: bridge
  internal:
    driver: bridge

volumes:
  drupal-data:
  db-data:
  certbot-etc:
保存并关闭文件。让webserver我们使用更新后的配置重新创建服务:
- docker-compose up -d --force-recreate --no-deps webserver
这将提供以下输出:
OutputRecreating webserver ... done
检查服务docker-compose ps:
- docker-compose ps
我们将看到mysql,drupal和webserver服务Up,同时certbot将与退出0状态消息:
Output  Name                 Command               State           Ports
--------------------------------------------------------------------------
certbot     certbot certonly --webroot ...   Exit 0
drupal      docker-php-entrypoint php-fpm    Up       9000/tcp
mysql       docker-entrypoint.sh --def ...   Up       3306/tcp, 33060/tcp
webserver   nginx -g daemon off;             Up       0.0.0.0:443->443/tcp, 0.0.0.0:80->80/tcp
现在,我们所有的服务都在运行,我们很高兴通过 Web 界面安装 Drupal。
步骤 6 — 通过 Web 界面完成安装
让我们通过 Drupal 的 Web 界面完成安装。
在 Web 浏览器中,导航到服务器的域。记得your_domain用你自己的域名替换这里:
https://your_domain
选择要使用的语言:
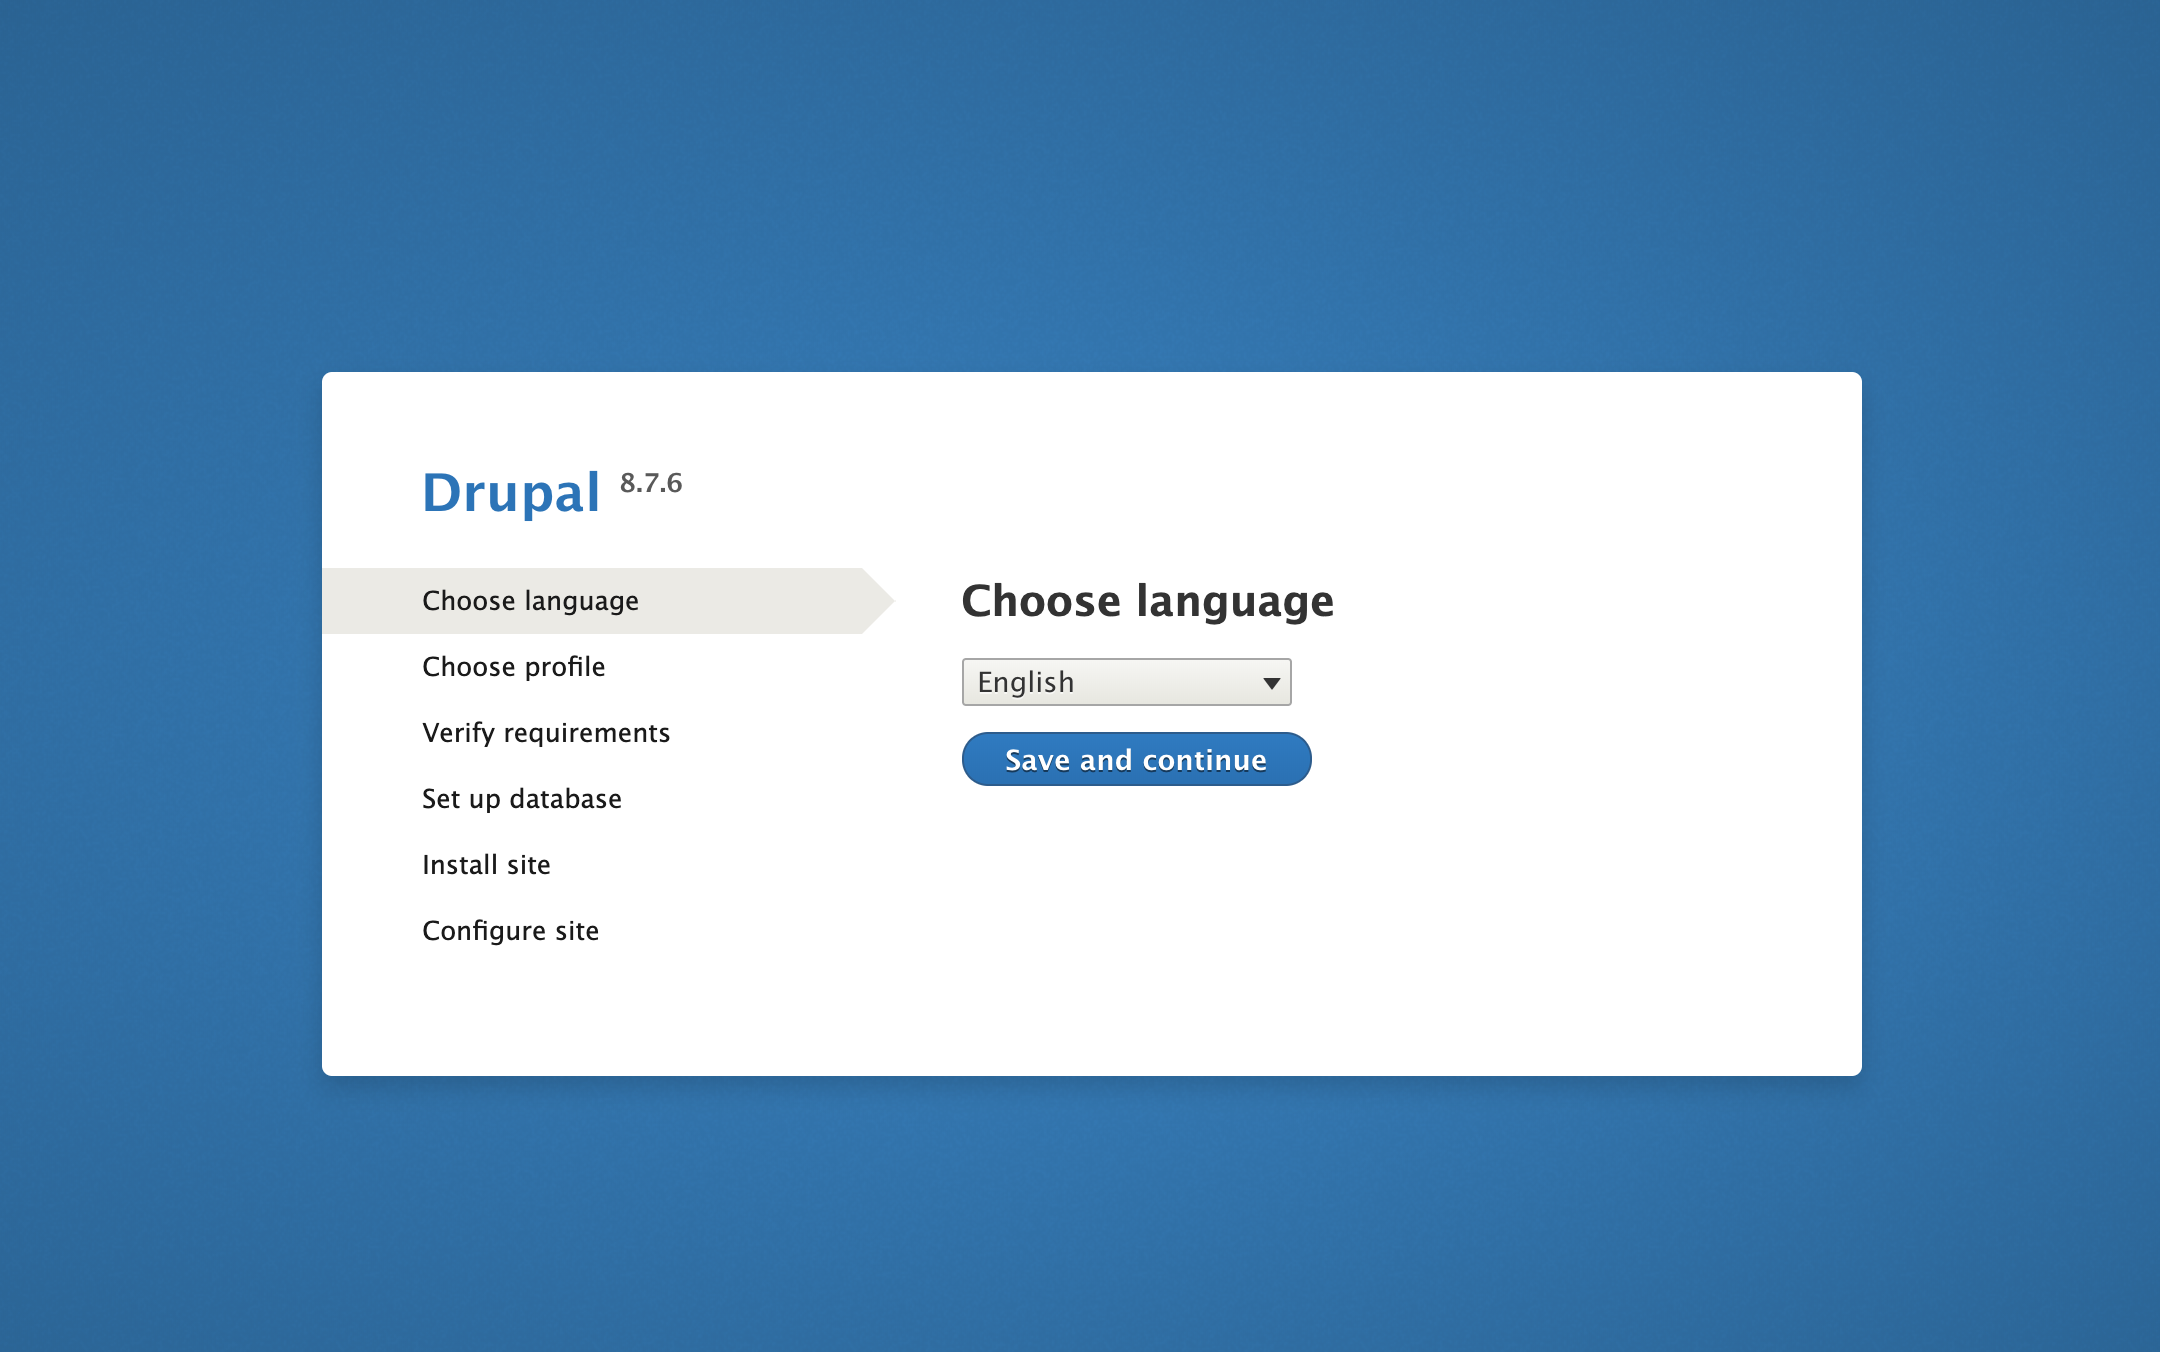
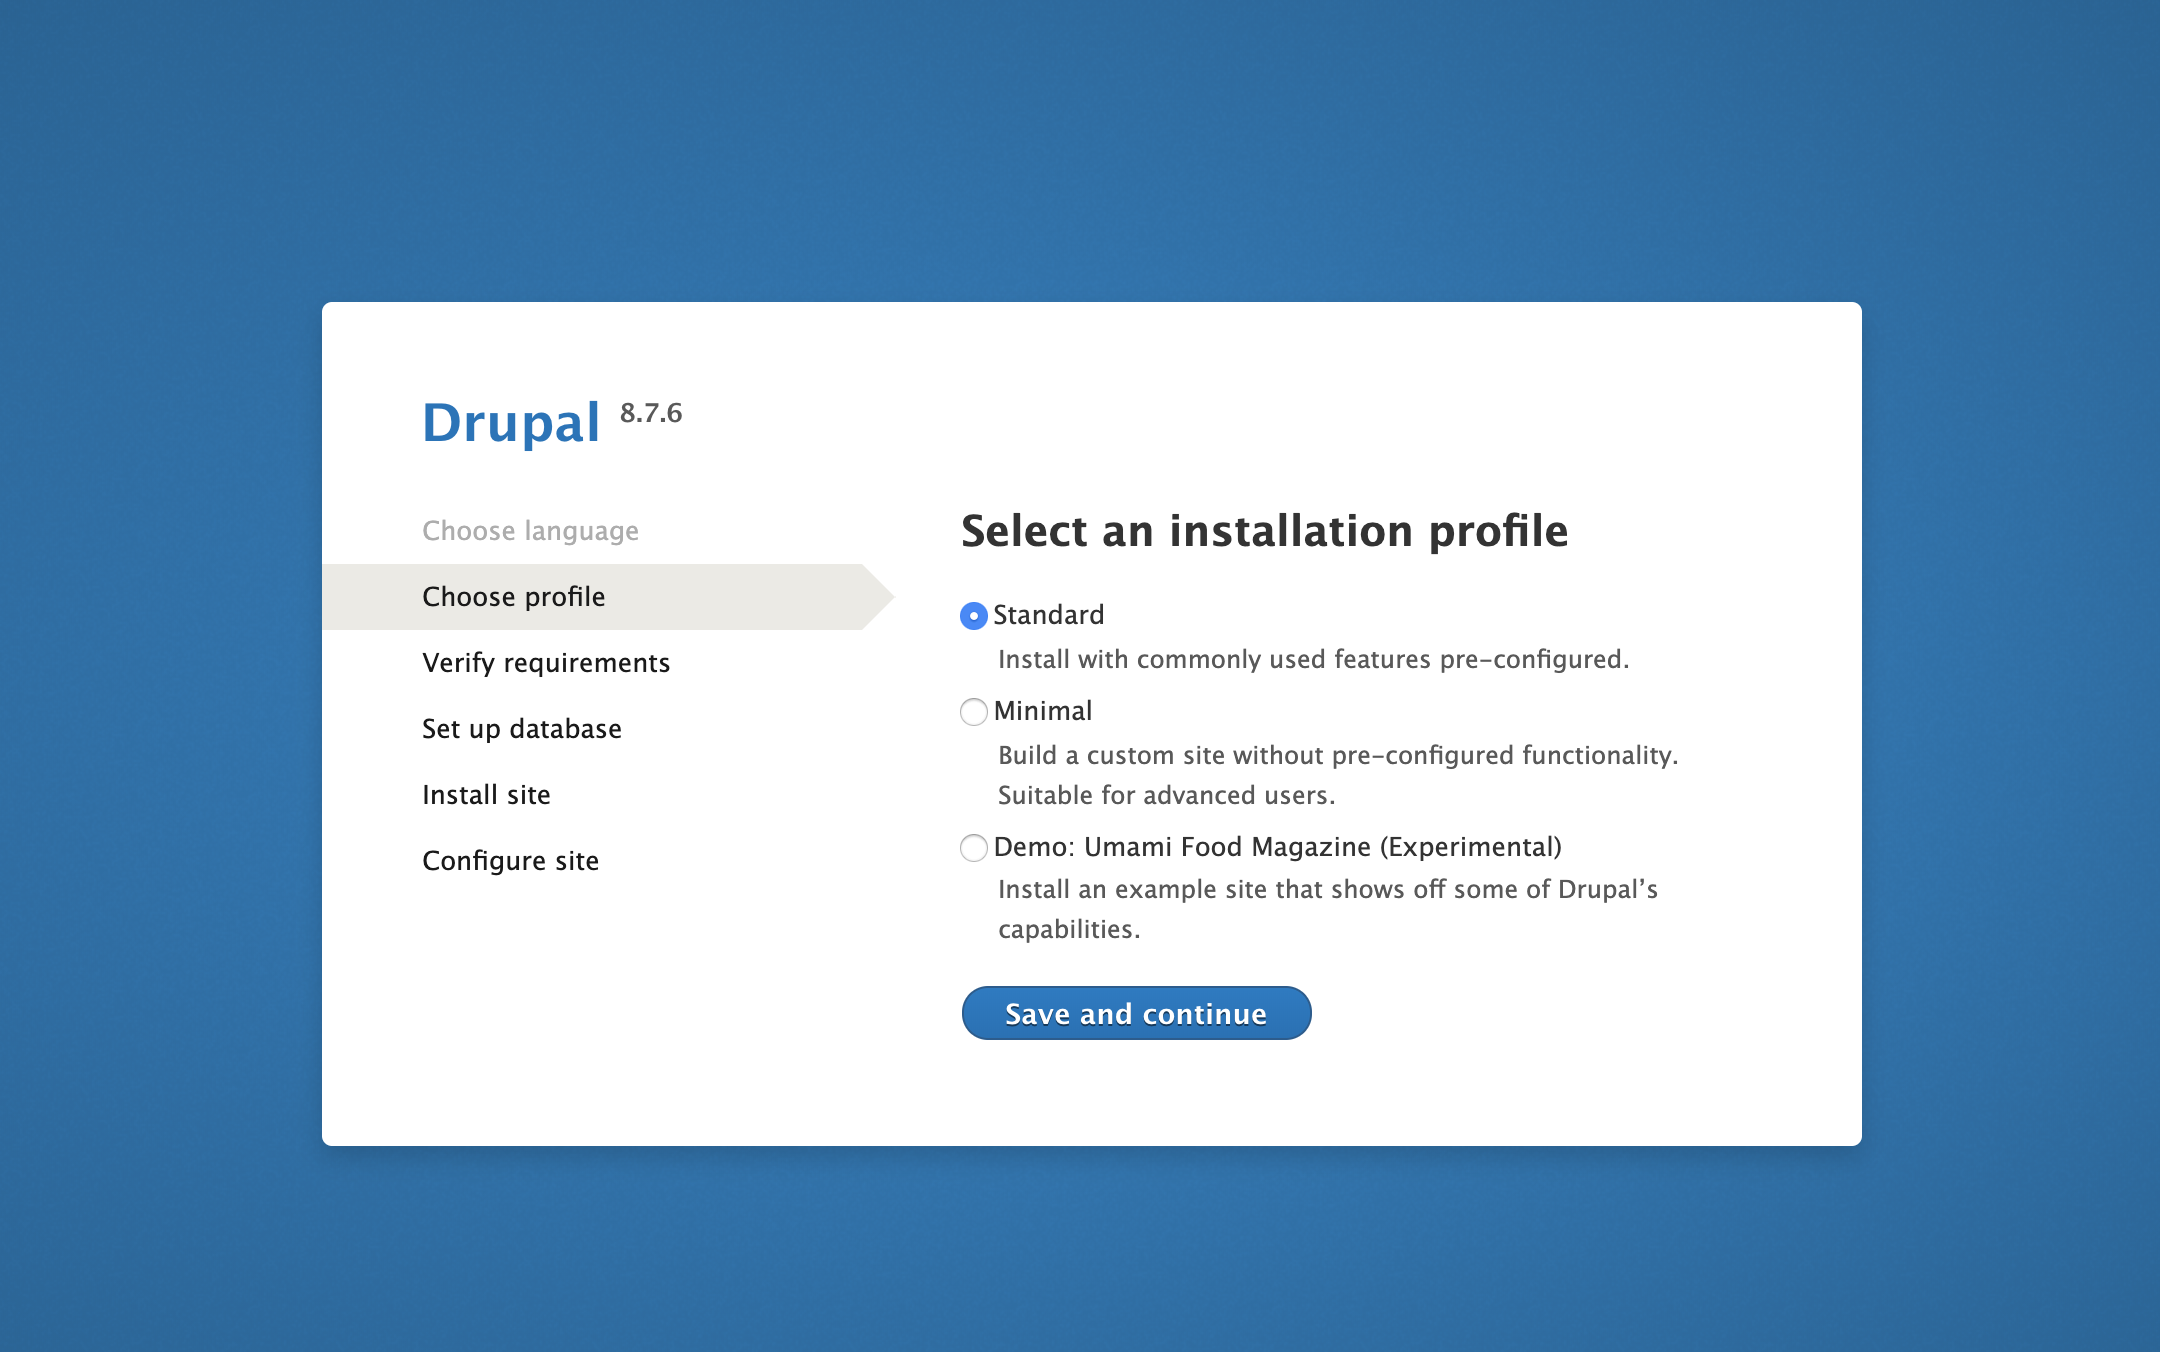
单击保存并继续。我们将登陆安装配置文件页面。Drupal 有多个配置文件,因此选择标准配置文件并单击Save and continue。
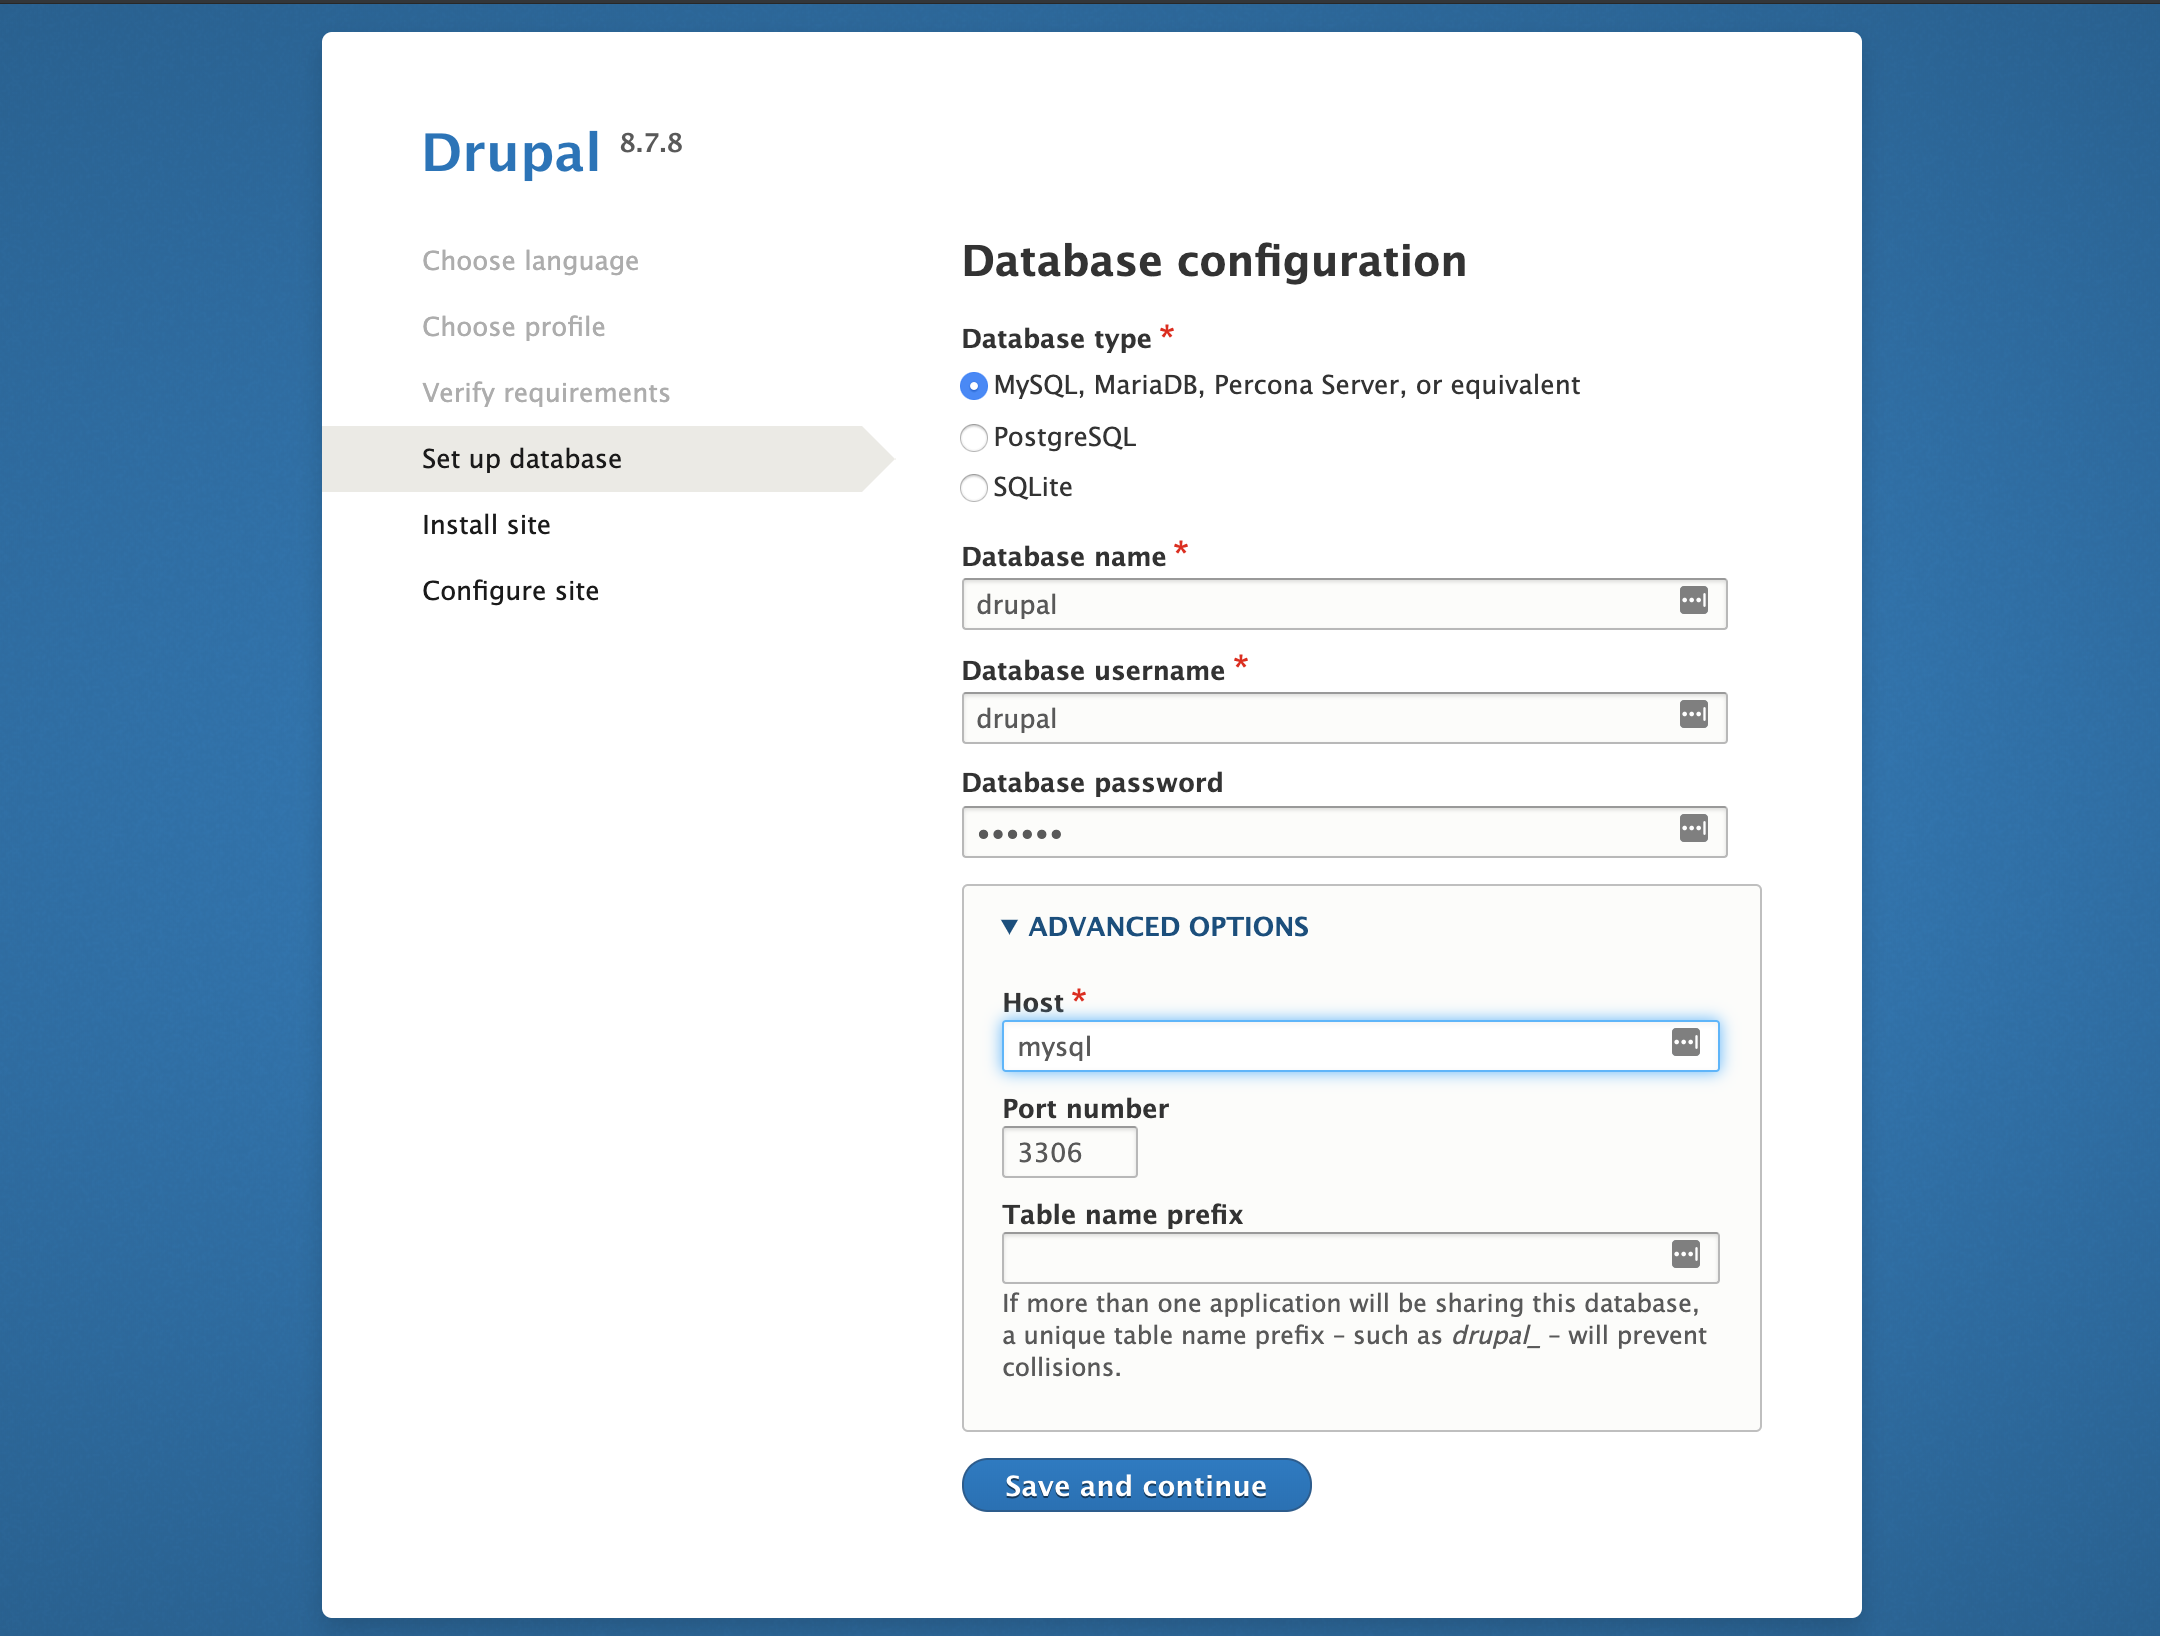
选择配置文件后,我们将前进到数据库配置页面。选择数据库类型为MySQL和MariaDB的,Percona的服务器或等效,并输入值数据库名称,用户名和密码,从值对应MYSQL_DATABASE,MYSQL_USER以及MYSQL_PASSWORD分别在定义.env文件中的步骤2.点击高级选项和设置Host 的值到mysql服务容器的名称。单击“保存并继续”。
配置数据库后,它将开始安装 Drupal 默认模块和主题:

站点安装完成后,我们将登陆 Drupal 站点设置页面,用于配置站点名称、电子邮件、用户名、密码和区域设置。填写信息并点击保存并继续:

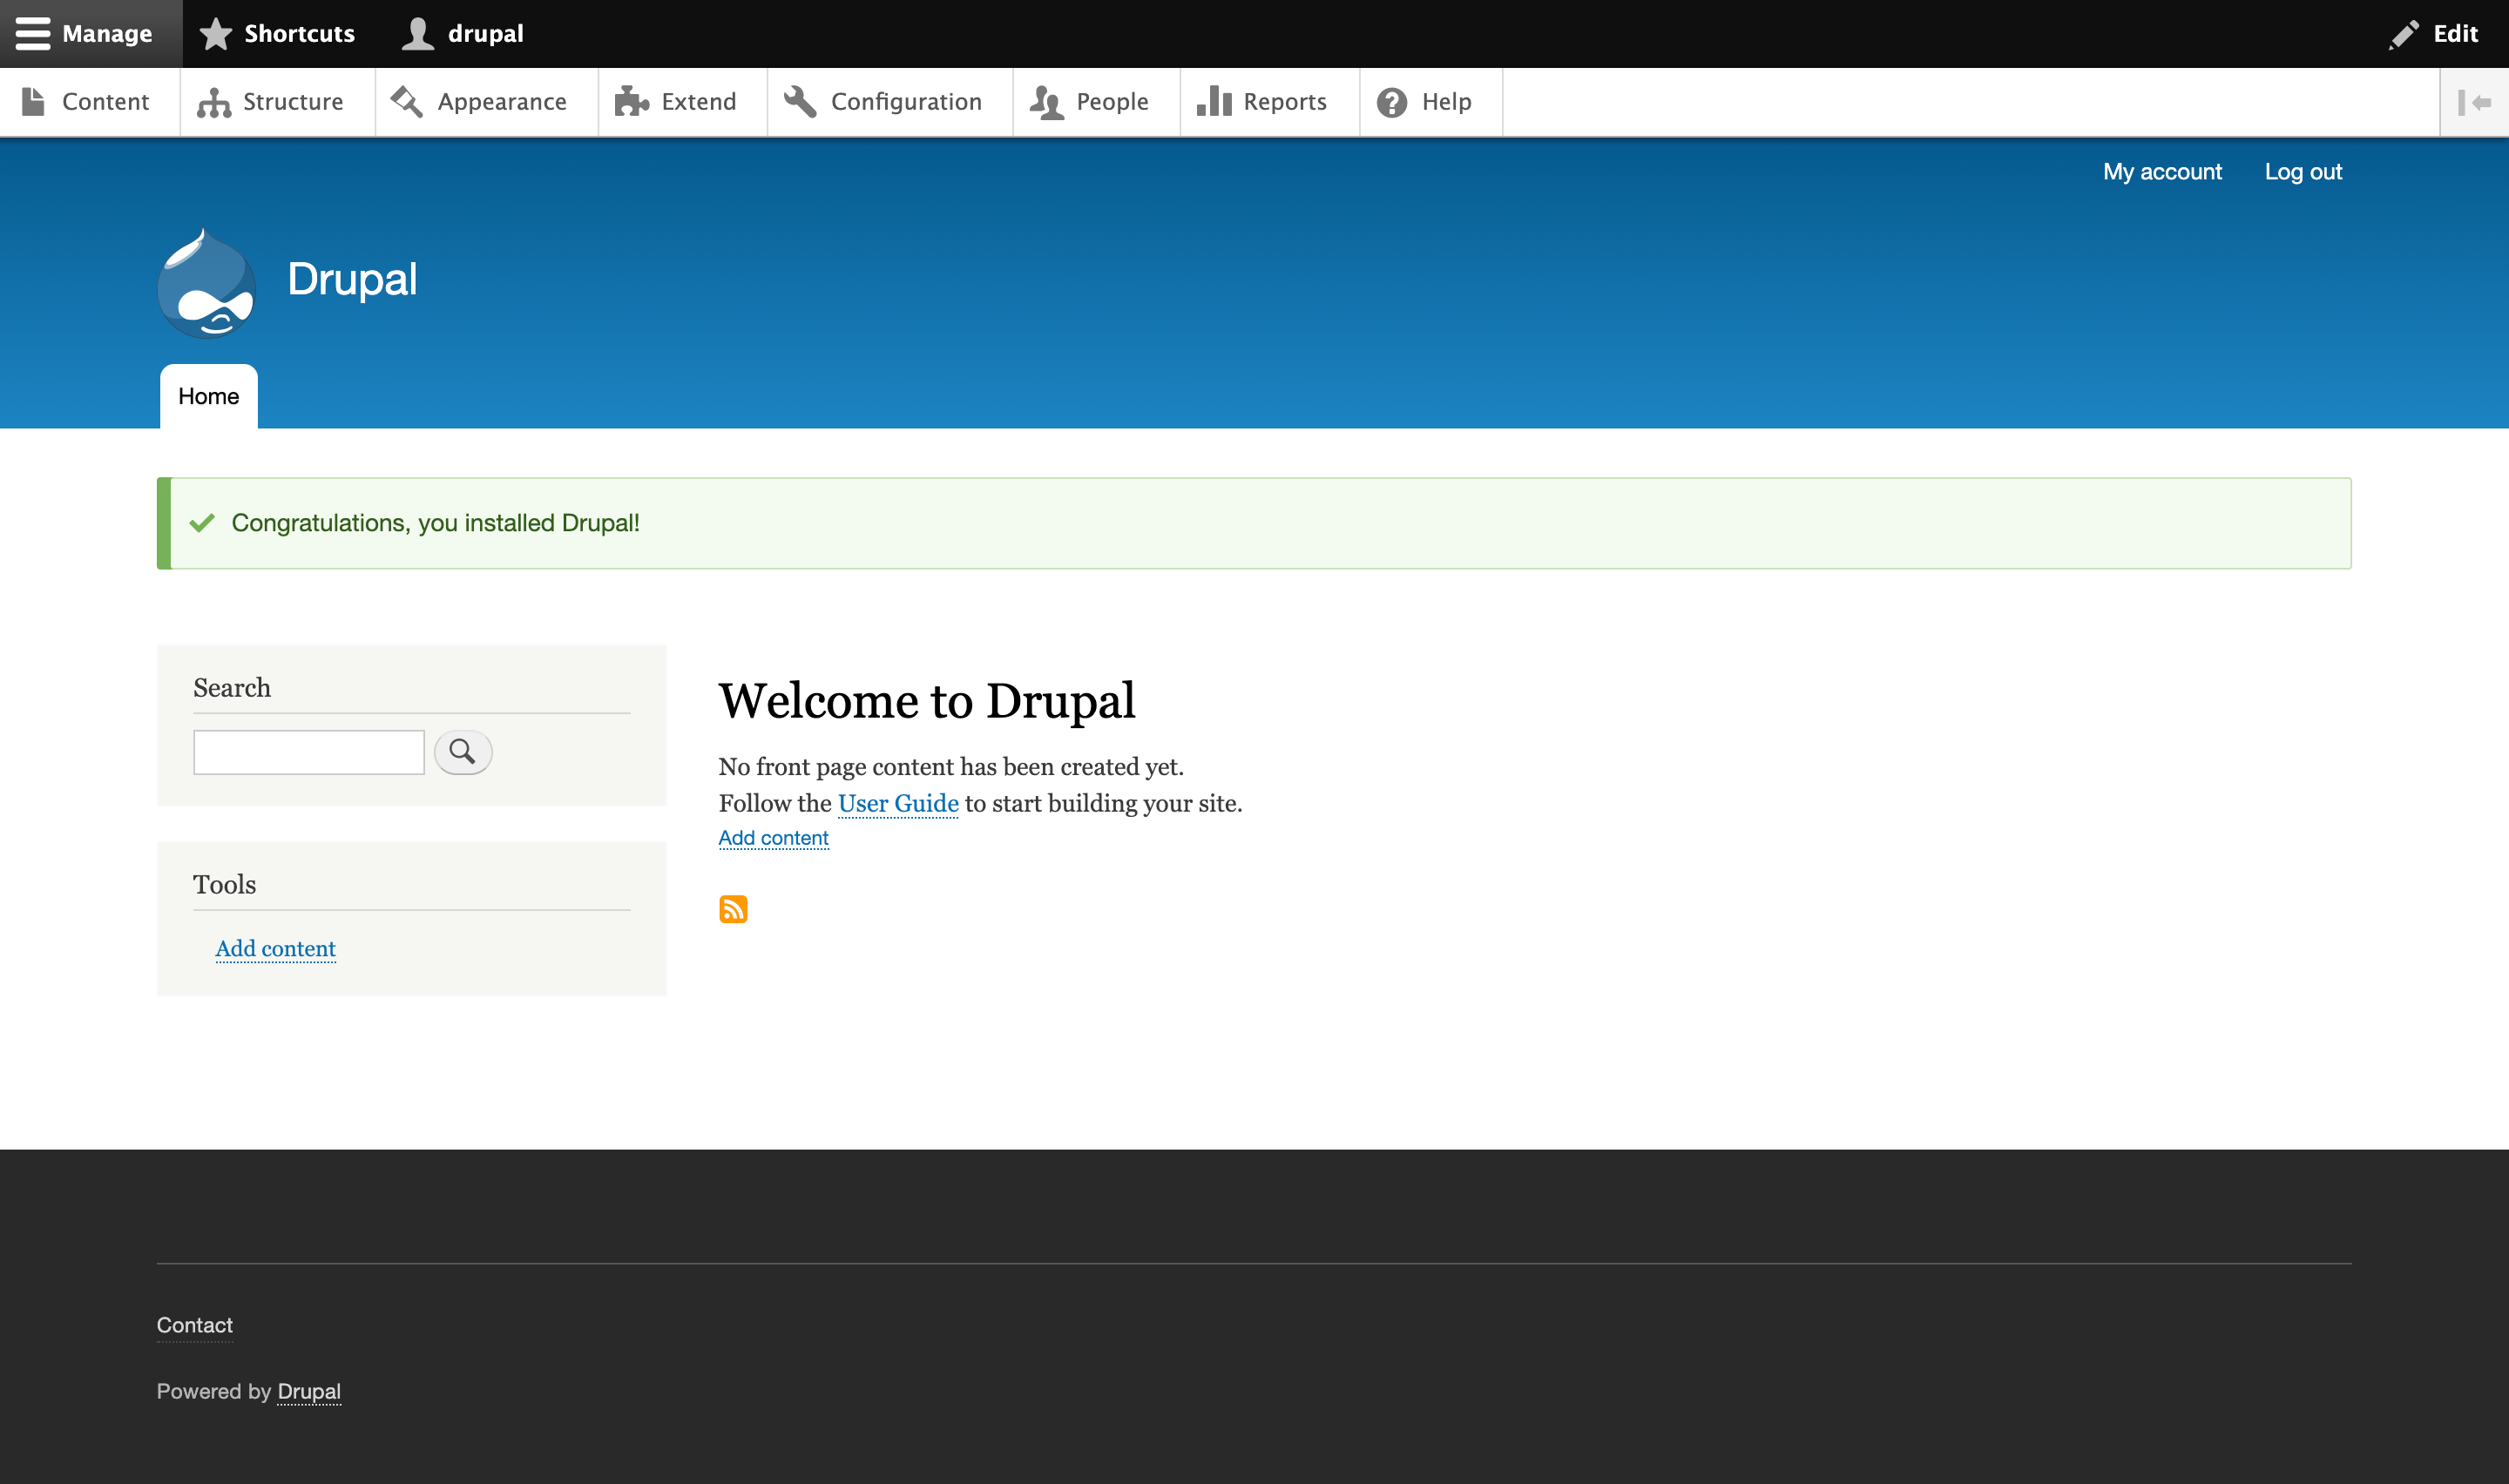
单击Save and continue 后,我们可以看到Welcome to Drupal页面,这表明我们的 Drupal 站点已成功启动并运行。
现在我们的 Drupal 安装已经完成,我们需要确保我们的 SSL 证书会自动更新。
步骤 7 — 更新证书
Let’s Encrypt 证书的有效期为 90 天,因此我们需要设置自动续订流程以确保它们不会失效。一种方法是使用cron调度实用程序创建作业。在这种情况下,我们将创建一个cron作业来定期运行一个脚本,该脚本将更新我们的证书并重新加载我们的 Nginx 配置。
让我们创建ssl_renew.sh文件来更新我们的证书:
- nano ssl_renew.sh
添加以下代码。请记住将目录名称替换为您自己的非 root 用户:
#!/bin/bash

cd /home/sammy/drupal/
/usr/local/bin/docker-compose -f docker-compose.yml run certbot renew --dry-run && \
/usr/local/bin/docker-compose -f docker-compose.yml kill -s SIGHUP webserver
此脚本更改为~/drupal项目目录并运行以下docker-compose命令。
-
docker-compose run:这将启动一个certbot容器并覆盖command我们certbot服务定义中提供的。certonly我们在renew这里不使用子命令,而是使用子命令,它将更新即将到期的证书。我们在--dry-run此处包含了测试脚本的选项。 -
docker-compose kill:这将向容器发送SIGHUP信号webserver以重新加载 Nginx 配置。
通过运行以下命令关闭文件并使其可执行:
- sudo chmod +x ssl_renew.sh
接下来,打开rootcrontab 文件以指定的时间间隔运行续订脚本:
- sudo crontab -e
如果这是您第一次编辑此文件,系统会要求您选择一个文本编辑器来打开文件:
Outputno crontab for root - using an empty one

Select an editor.  To change later, run 'select-editor'.
  1. /bin/nano
  2. /usr/bin/vim.basic
  3. /usr/bin/vim.tiny
  4. /bin/ed

Choose 1-4 [1]:
...
在文件末尾,添加以下行,替换sammy为您的用户名:
...
*/5 * * * * /home/sammy/drupal/ssl_renew.sh >> /var/log/cron.log 2>&1
这会将作业间隔设置为每五分钟,因此我们可以测试我们的续订请求是否按预期工作。我们还创建了一个日志文件cron.log,用于记录作业的相关输出。
五分钟后,使用tail命令查看cron.log续订请求是否成功:
- tail -f /var/log/cron.log
您将看到确认续订成功的输出:
Output** DRY RUN: simulating 'certbot renew' close to cert expiry
**          (The test certificates below have not been saved.)

Congratulations, all renewals succeeded. The following certs have been renewed:
  /etc/letsencrypt/live/your_domain/fullchain.pem (success)
** DRY RUN: simulating 'certbot renew' close to cert expiry
**          (The test certificates above have not been saved.)
- - - - - - - - - - - - - - - - - - - - - - - - - - - - - - - - - - - - - - - -
按CTRL+C退出该tail过程。
我们现在可以修改 crontab 文件以在每周的第二天凌晨 2 点运行脚本。将 crontab 的最后一行更改为以下内容:
...
* 2 * * 2 /home/sammy/drupal/ssl_renew.sh >> /var/log/cron.log 2>&1
退出并保存文件。
现在,让我们--dry-run从ssl_renew.sh脚本中删除该选项。首先,打开它:
- nano ssl_renew.sh
然后将内容更改为以下内容:
#!/bin/bash

cd /home/sammy/drupal/
/usr/local/bin/docker-compose -f docker-compose.yml run certbot renew && \
/usr/local/bin/docker-compose -f docker-compose.yml kill -s SIGHUP webserver
cron现在,我们的工作将通过在符合条件时更新 SSL 证书来处理 SSL 证书的过期问题。
结论
在本教程中,我们使用 Docker Compose 创建了一个带有 Nginx Web 服务器的 Drupal 安装。作为此工作流程的一部分,我们为想要与我们的 Drupal 站点关联的域获取了 TLS/SSL 证书,并在必要时创建了一个 cron 作业来更新这些证书。
如果您想了解有关 Docker 的更多信息,请查看我们的Docker 主题页面。
