容器链接允许多个容器相互链接。这比暴露端口更好。让我们一步一步来学习它是如何工作的。
步骤1-使用Jenkins pull命令下载Jenkins image镜像(如果尚不存在)。

步骤2-一旦image镜像可用,运行容器,但是这次,您可以使用–-name选项为容器指定名称。这将是我们的源容器。

步骤3-接下来,是时候启动目标容器了,但是这次,我们将其链接到我们的源容器。对于目标容器,我们将使用标准的Ubuntuimage镜像。

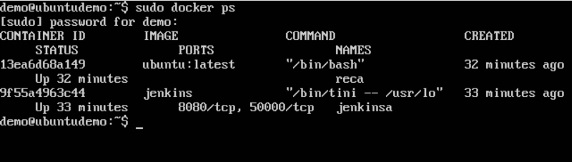
当您执行docker ps时,您将看到两个容器都在运行。
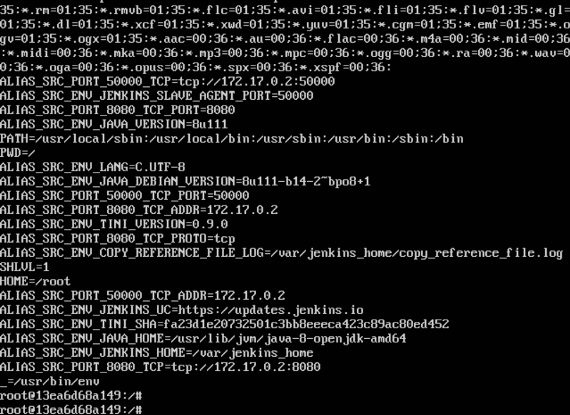
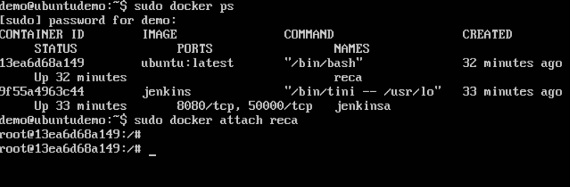
步骤4-现在,连接到接收容器。
然后运行env命令。您会注意到用于与源容器链接的新变量。