本系列的一部分:
如何使用 Laravel 和 Docker Compose 在 PHP 中构建链接登陆页面
Laravel是一个开源 PHP 框架,它提供了一组工具和资源来构建现代 PHP 应用程序。在这个基于项目的教程系列中,您将使用 Laravel 框架构建一个Links Landing Page应用程序,使用由 Docker Compose 管理的容器化 PHP 开发环境。
最后,您将拥有一个使用 Laravel 构建并通过 Artisan 命令管理的单页网站,您可以在其中将相关链接分享给社交渠道和演示文稿上的受众。
到目前为止,您已经了解了如何使用迁移设置应用程序的 MySQL 数据库表,如何创建 Eloquent 模型以与链接表交互,以及如何创建 Artisan 命令来管理数据库中的链接。您现在将看到如何创建自定义 Blade 模板以在应用程序的前端显示您的链接。为了在保持最小化的同时简化此页面的样式,在本系列中,我们将使用Bulma,一个单文件 CSS 框架。
Laravel 网络路由文件中设置的默认路由指向一个示例模板,您可以在 中找到该模板resources/views/welcome.blade.php。您将index.blade.php在同一目录中创建一个新文件,并编辑主路由文件,以便/路由指向此模板。在路由定义中,您还需要获取要在新索引模板中显示的所有链接的列表。
首先更新 Laravel 应用程序的路由文件。routes/web.php使用您选择的文本或代码编辑器打开文件:
- nano routes/web.php
你当前的/路由默认指向 Laravel 自带的示例页面:
Route::get('/', function () {
    return view('welcome');
});
要进行建议的更改,首先您将使用LinkEloquent 模型从数据库中获取所有链接,并按降序对它们进行排序以确保首先列出您创建的任何新链接,因此将显示在页。
$links = Link::all()->sortDesc();
该view辅助函数就会查找名为模板文件welcome.blade.php,在根resources/views目录下,并呈现结果返回给浏览器。您将更改它以指向一个新index.blade.php模板。此外,您将$links变量作为模板数据传递。
    return view('index', [
        'links' => $links
    ]);
以下代码实现了所讨论的/路由更改。将routes/web.php文件中的内容替换为:
<?php

use Illuminate\Support\Facades\Route;
use App\Models\Link;

/*
|--------------------------------------------------------------------------
| Web Routes
|--------------------------------------------------------------------------
|
| Here is where you can register web routes for your application. These
| routes are loaded by the RouteServiceProvider within a group which
| contains the "web" middleware group. Now create something great!
|
*/

Route::get('/', function () {
    return view('index', [
        'links' => Link::all()->sortDesc()
    ]);
});
完成后保存并关闭文件。
路由文件已全部设置好,但是如果您现在尝试访问主应用程序的页面,您将收到一条错误消息,因为index.blade.php模板尚不存在。您现在将创建它。
您可以将您的模板基于Bulma 入门模板,该模板提供带有标题、副标题和主要内容区域的最小 HTML 页面结构。稍后,您将包含一些 CSS 样式来自定义此页面的外观。
首先,index.blade.php使用您选择的文本或代码编辑器创建一个新模板:
- nano resources/views/index.blade.php
除了创建页面结构和您可能想要使用的静态元素(例如标题和其他信息)的 HTML 样板代码之外,您还需要显示作为模板数据传递的链接列表——aLink对象的集合。
您可以使用 Blade 的foreach 循环来循环遍历集合中的链接,并将它们输出到页面:
            @foreach ($links as $link)
                <li>
                    <a href="{{ $link->url }}" target="_blank" title="Visit Link: {{ $link->url }}">{{ $link->description }}</a>
                </li>
            @endforeach
在您的index.blade.php文件中包含以下内容。随意自定义页面中的标题和其他信息:
<!DOCTYPE html>
<html>
<head>
    <meta charset="utf-8">
    <meta name="viewport" content="width=device-width, initial-scale=1">
    <title>Sammy's Awesome Links</title>
    <link rel="stylesheet" href="https://cdn.jsdelivr.net/npm/[email protected]/css/bulma.min.css">
</head>
<body>
<section class="section">
    <div class="container">
        <h1 class="title">
            Check out my awesome links
        </h1>
        <p class="subtitle">
            You can include a little description here.
        </p>

        <ul>
            @foreach ($links as $link)
                <li>
                    <a href="{{ $link->url }}" target="_blank" title="Visit Link: {{ $link->url }}">{{ $link->description }}</a>
                </li>
            @endforeach
        </ul>
    </div>
</section>
</body>
</html>
完成后保存文件。
现在转到您的浏览器检查结果。你应该能够在端口访问应用程序8000的任何localhost或远程服务器的IP地址,如果你使用的是远程服务器作为开发平台。
http://localhost:8000
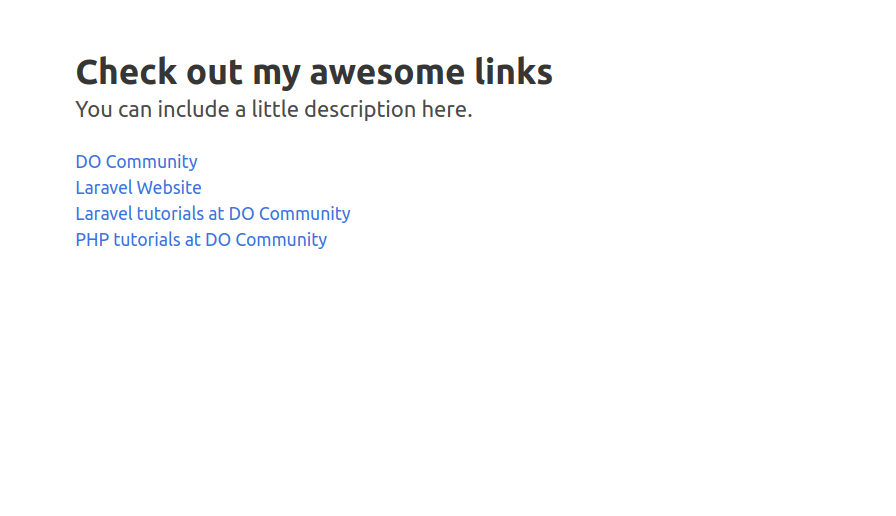
您将看到这样的页面,显示数据库中从最新到第一的所有链接:

您的应用程序现在功能齐全,但您仍然可以改进此起始页的外观,使其对您的受众更具吸引力。
样式和自定义模板(可选)
现在基本模板已准备就绪,除了自定义样式之外,您还可以包含一些可选的 CSS 自定义,以使用 Bulma 中的一些可用功能来设置页面样式。
要使此页面焕然一新,您可以从设置整页背景开始。在本指南中,我们将使用DigitalOcean 壁纸,但作为替代,您也可以使用个人图片或来自免费图片网站(例如unsplash )的图片。您需要获取图像 URL 并使用它来设置元素的backgroundCSS 属性html。可以调整其他一些属性以确保图像集中。
html {
            background: url("https://i.imgur.com/BWIdYTM.jpeg") no-repeat center center fixed;
            -webkit-background-size: cover;
            -moz-background-size: cover;
            -o-background-size: cover;
            background-size: cover;
        }
要设置链接列表的样式,您可能希望将<li>每个链接的元素替换为box components,并将链接 URL 作为一个段落包含在链接描述下。
            @foreach ($links as $link)
                <div class="box link">
                    <h3><a href="{{ $link->url }}" target="_blank" title="Visit Link: {{ $link->url }}">{{ $link->description }}</a></h3>
                    <p>{{$link->url}}</p>
                </div>
            @endforeach
最后,您可以创建几个额外的 CSS 样式来自定义链接文本的外观。
        div.link h3 {
            font-size: large;
        }

        div.link p {
            font-size: small;
            color: #718096;
        }
以下 Blade 模板包含所有建议的实现。将您当前的index.blade.php文件内容替换为:
<!DOCTYPE html>
<html>
<head>
    <meta charset="utf-8">
    <meta name="viewport" content="width=device-width, initial-scale=1">
    <title>Sammy's Awesome Links</title>
    <link rel="stylesheet" href="https://cdn.jsdelivr.net/npm/[email protected]/css/bulma.min.css">

    <style>
        html {
            background: url("https://i.imgur.com/BWIdYTM.jpeg") no-repeat center center fixed;
            -webkit-background-size: cover;
            -moz-background-size: cover;
            -o-background-size: cover;
            background-size: cover;
        }

        div.link h3 {
            font-size: large;
        }

        div.link p {
            font-size: small;
            color: #718096;
        }
    </style>
</head>
<body>
<section class="section">
    <div class="container">
        <h1 class="title">
            Check out my awesome links
        </h1>
        <p class="subtitle">
            You can include a little description here.
        </p>

        <section class="links">
            @foreach ($links as $link)
                <div class="box link">
                    <h3><a href="{{ $link->url }}" target="_blank" title="Visit Link: {{ $link->url }}">{{ $link->description }}</a></h3>
                    <p>{{$link->url}}</p>
                </div>
            @endforeach
        </section>
    </div>
</section>
</body>
</html>
完成后保存文件。
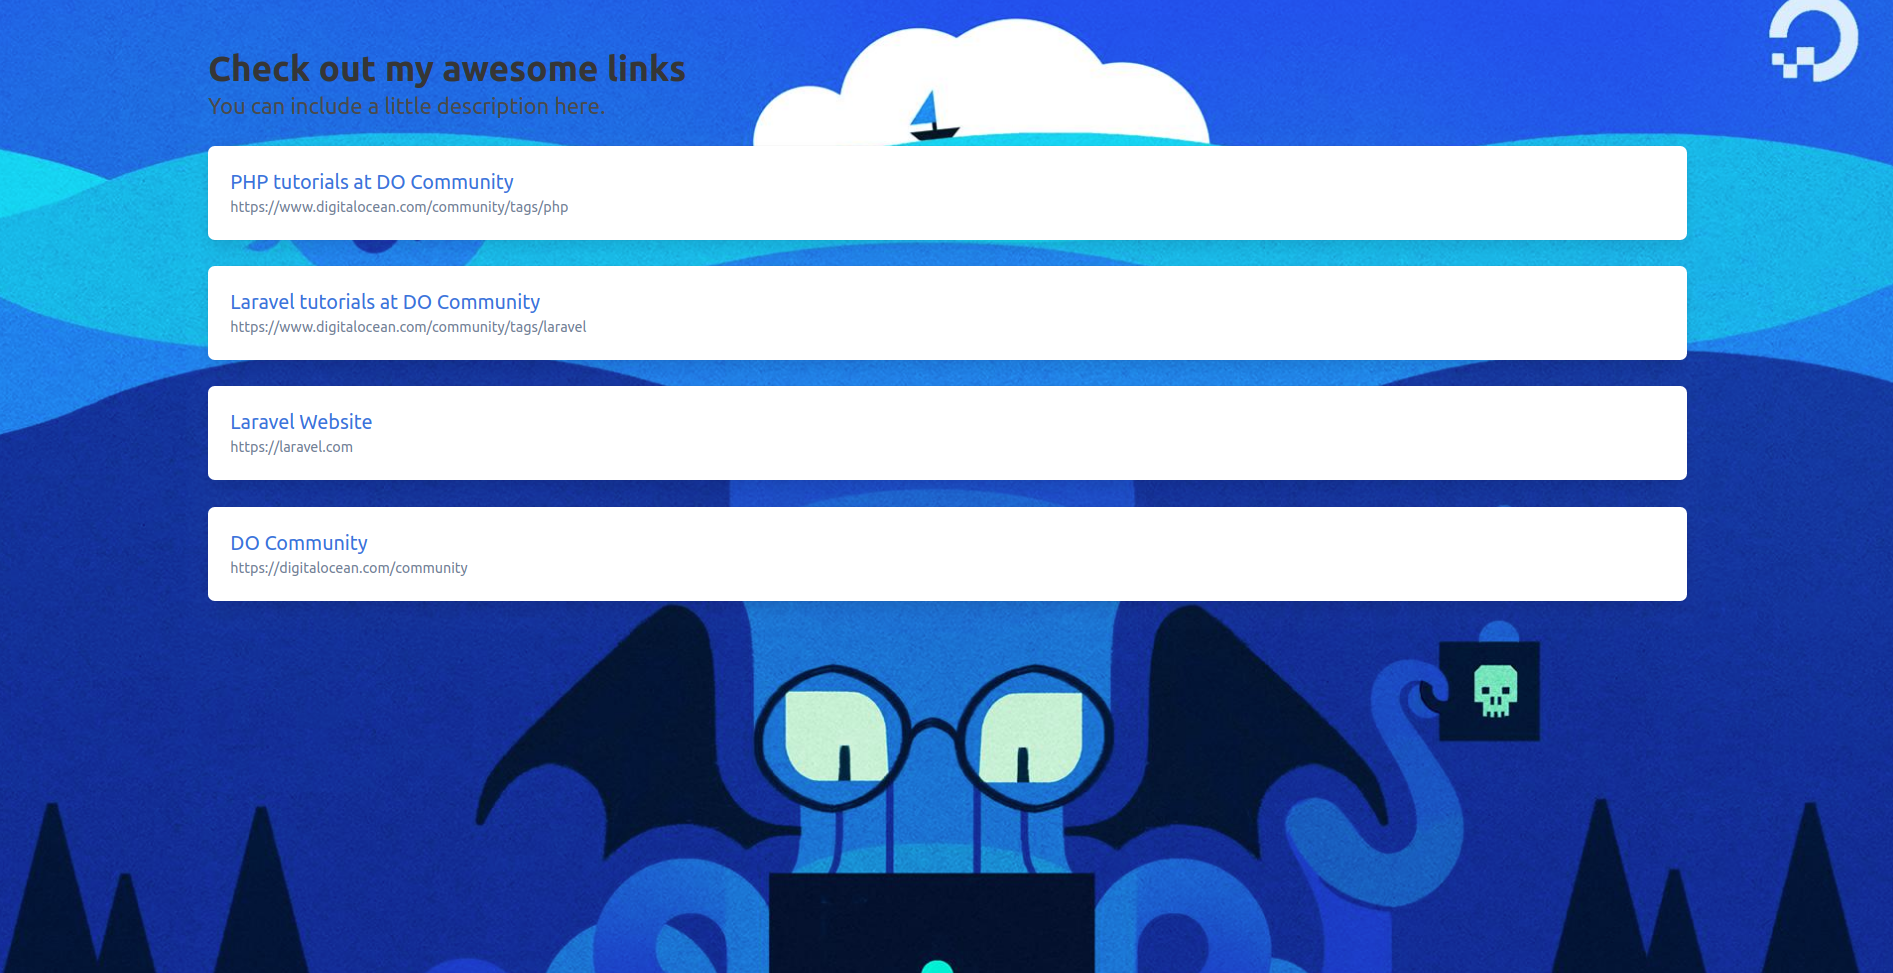
现在重新加载浏览器,您将看到更新后的页面:

